


TL;DR:
- Preparing a pet for air travel involves securing a vet-issued health certificate, assembling the correct documents, and conditioning an IATA-compliant crate weeks in advance. A premium transfer service ensures real-time flight monitoring, climate-controlled handling, and smooth terminal handoffs to reduce pet stress during travel. Proper planning, crate conditioning, and proactive coordination significantly improve your pet’s safety and comfort throughout the journey.
Before you leave home, three things must be done: get a vet-issued fit-to-travel certificate with current rabies vaccination and microchip records, confirm your crate is IATA-compliant and labeled, and coordinate your pickup with a premium transfer driver who offers real-time flight monitoring and meet-and-greet service. Everything else in this guide builds on those three steps.
Your pre-departure essentials:
- Documents: Fit-to-travel health certificate, rabies vaccination record, microchip registration printout, and feeding/watering declaration
- Crate: IATA-compliant, ventilated, labeled “LIVE ANIMAL,” with document pouch attached to the exterior
- Driver coordination: Confirm flight monitoring, terminal access, and climate-controlled vehicle with your transfer provider before travel day
A premium transfer service handles the parts most owners overlook: the driver monitors your flight in real time, coordinates terminal access, and loads the crate in a climate-controlled vehicle with quiet, deliberate handling. That coordination alone cuts the two biggest sources of pet stress at the airport.
Table of Contents
- What does your pet airport transfer preparation checklist look like?
- How do you choose and condition the right crate?
- What goes in your pet’s travel kit?
- What should you do on the day of the transfer?
- What extra care do anxious, elderly, or brachycephalic pets need?
- How do you handle delays, refusals, and medical emergencies?
- How long does preparation take, and what extra fees should you expect?
- How does Solidride handle a pet airport transfer from start to finish?
- Key Takeaways
- Why premium transfers actually change the outcome for your pet
- Traveling to or from Estonia with a pet? Solidride has you covered
What does your pet airport transfer preparation checklist look like?
Book your vet visit within the required window and leave the clinic with a signed health certificate, current vaccination records, and a written feeding declaration. USDA-APHIS requires a health and acclimation certificate attached to the kennel, along with feeding and watering instructions for the next 24 hours.
Mandatory documents to gather:
- Rabies vaccination certificate (current, not expired)
- Certificate of Veterinary Inspection (CVI) or health certificate, issued within the required window (commonly 10 days before travel for domestic U.S. movement; check destination rules)
- Microchip ID number and registry printout
- Import/export permits if crossing international borders
- Written feeding/watering declaration: APHIS requires a signed statement that food and water were offered within four hours of airport arrival, plus instructions for the next 24 hours
The Merck Veterinary Manual flags incomplete vaccinations and unreadable microchips as the most common reasons animals are refused at check-in. Both are easy to fix at the vet visit — but only if you go early enough.
Place originals in a sealed envelope in your carry-on. Attach copies in a clear plastic pouch to the exterior of the kennel so cargo handlers can access them without opening the crate.
Pro Tip: Ask your vet to scan the microchip at the appointment and confirm the registry shows your current phone number and address. A chip that reads but links to an old number is nearly as useless as no chip at all.
| Action | Responsible | Deadline |
|---|---|---|
| Book vet appointment | Owner | 4–6 weeks before travel |
| Obtain health certificate (CVI) | Vet | Within 10 days of departure (domestic U.S.) |
| Confirm microchip is readable | Vet | At vet visit |
| Update microchip registry | Owner | Before leaving clinic |
| Prepare feeding/watering declaration | Owner + Vet | 24–48 hours before travel |
| Gather import/export permits | Owner | 4–6 weeks before (international) |
International requirements vary widely. Destination-specific rules on microchip timing, rabies titer tests, and health certificate formats can take weeks or months to satisfy. Check early.
How do you choose and condition the right crate?
Use an airline/IATA-compliant crate sized so your pet can stand without touching the ceiling, turn a full circle, and lie down flat. That sizing rule exists because a crate that’s too small causes physical stress; one that’s too large lets the animal slide during loading.
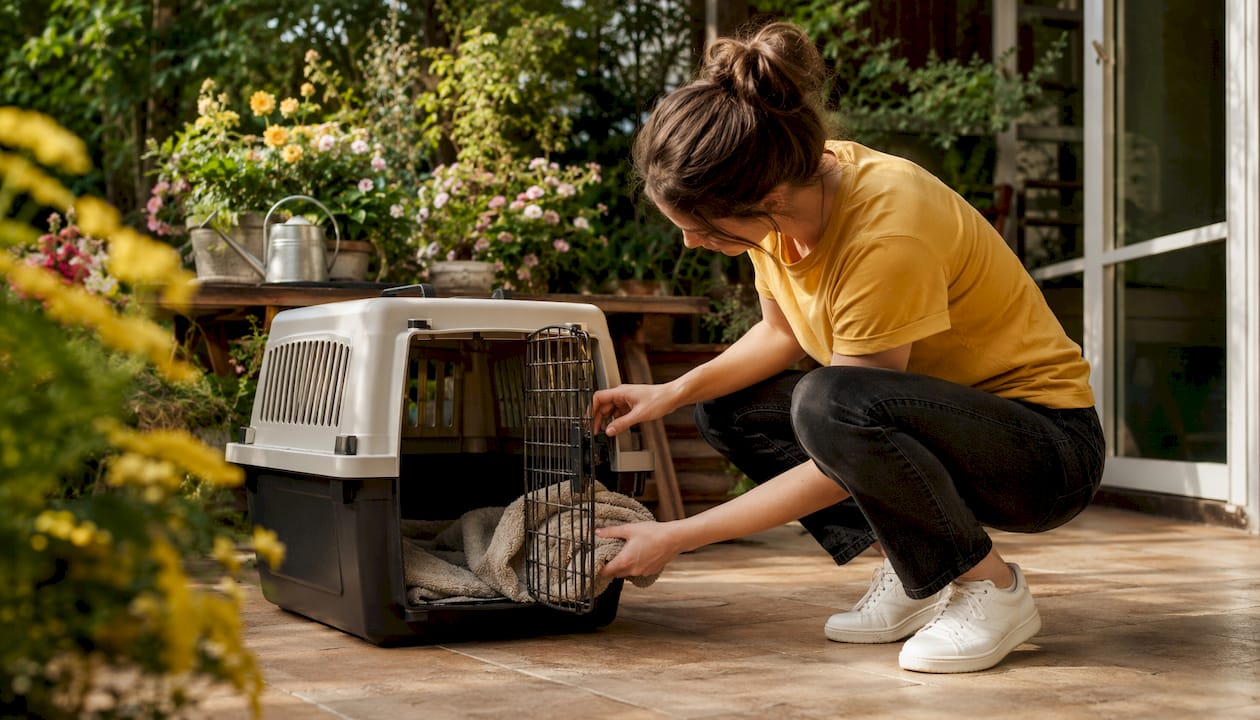
APHIS specifies that kennels must be well-constructed, leak-proof, and ventilated, with food and water bowls attached inside the door and “LIVE ANIMAL” labels plus upright arrows on the exterior. No plastic clips on fasteners — metal bolts only.
Step-by-step conditioning plan (start 4–6 weeks out):
- Place the open crate in a room your pet uses daily. Let them investigate without pressure.
- Put meals inside the crate for one week. Door stays open.
- Begin closing the door for short periods during meals. Gradually extend.
- Take two or three short car rides with the pet in the crate. Keep them calm and positive.
- Run a mock check-in: load the crate into a vehicle, drive to a busy parking area, unload, and reload. This mimics the airport handoff environment.
- Final week: the crate should be where your pet chooses to rest.
A 4–6 week acclimation program that pairs the crate with meals and positive experiences is the single most effective way to reduce travel anxiety. Last-minute crate introductions almost always backfire.
Crate safety checklist:
- Metal bolt fasteners on all seams (no plastic clips)
- Leak-proof floor with absorbent pad inside
- Food and water bowls attached inside the door, fillable from outside
- “LIVE ANIMAL” stickers on at least two sides, directional arrows visible
- Document pouch attached to exterior
- No thick bedding that reduces standing clearance
Before travel, wipe the interior with a non-toxic, pet-safe disinfectant and let it air dry completely. After the transfer, repeat the process before storing.
Pro Tip: Place a worn t-shirt or small towel from your home inside the crate. The Merck Veterinary Manual confirms that familiar scent calms animals more reliably than most commercial anxiety products, provided it doesn’t block ventilation.
What goes in your pet’s travel kit?
Pack documents, 24–48 hours of familiar food, medications, leash and harness, a scent cloth, absorbent pads, and a basic vet first-aid kit. Organize by priority so you can hand off the crate quickly without digging through a bag.
Packing list by priority:
- Documents (attach to crate + carry-on): Health certificate copies, vaccination records, microchip printout, feeding declaration, emergency vet contact
- Health and medications: Vet-prescribed medications in a labeled zip-lock bag with written dosage instructions; anti-anxiety supplements if vet-approved
- Comfort: Scent cloth or worn t-shirt, one small soft toy (no hard bones, rope toys, or squeaky toys)
- Feeding: 24–48 hours of regular food in a sealed, labeled bag; ice cubes for the water bowl (not liquid water, which spills during loading)
- Sanitation: Absorbent pads for crate floor, waste bags, non-toxic wipes
| Item | Container | Placement |
|---|---|---|
| Document copies | Clear plastic pouch | Attached to crate exterior |
| Food | Sealed, labeled zip-lock | Taped to crate top |
| Medications | Labeled zip-lock with instructions | Owner’s carry-on |
| Scent cloth | Loose | Inside crate |
| Absorbent pad | Flat | Crate floor |
| Emergency vet contact | Laminated card | Document pouch on crate |
Label the crate exterior with: owner name, phone number, destination address, pet’s name, and emergency vet contact. Use waterproof labels or a permanent marker on laminated card stock.
What should you do on the day of the transfer?
Confirm flight status and your driver’s ETA first thing in the morning, then attach the document pouch to the kennel before the driver arrives. That sequence matters because a missing pouch discovered at the cargo counter causes the kind of delay that routing errors routinely trigger during handler inspection.
Day-of sequence:
- Offer food and water at least four hours before airport arrival. Record the time in writing for the feeding declaration.
- Walk dogs; allow cats a final litter box visit.
- Attach document pouch to crate. Verify all copies are inside.
- Confirm driver ETA and flight status via your transfer provider’s monitoring system.
- Load pet into crate calmly. Remove collar to prevent snagging on door vents.
- Secure crate in the vehicle’s stable load area. Climate control should be running before the pet enters.
- Arrive at the airport with enough time for pet-specific check-in. Many airlines require arrival 3–4 hours before departure for cargo animals.
- Hand crate to airline cargo staff with document pouch visible and accessible.
Roles at handoff:
- Owner: Final feeding time recorded, scent cloth inside crate, document pouch attached, collar removed
- Driver: Real-time flight monitoring active, terminal access confirmed, climate-controlled vehicle ready, coordinated handoff with cargo or private terminal staff
- Airline/handler: Document inspection, crate inspection, routing verification
Pro Tip: When booking your premium transfer, confirm in writing that the driver has pre-authorized access to the cargo or private terminal area. A driver who can accompany you to the cargo counter — rather than dropping you at departures — cuts handoff time and reduces the window your pet spends in a loud, unfamiliar environment. Solidride’s meet-and-greet service covers exactly this.
Choosing direct flights and minimizing intermediate handling events reduces stress and mishandling risk. If a connection is unavoidable, keep layovers under three hours where possible.
What extra care do anxious, elderly, or brachycephalic pets need?
Identify your pet’s risk category before booking and discuss a tailored plan with your vet and transfer provider. Some animals need more than a standard checklist.
| Category | Key Risk | Recommended Mitigation |
|---|---|---|
| Anxious pets | Panic, escape attempts | Extended acclimation (6+ weeks), vet-approved anti-anxiety supplement, scent cloth |
| Elderly animals | Temperature sensitivity, joint stress | Extra padding, shorter travel windows, vet clearance within 7 days of travel |
| Brachycephalic breeds (bulldogs, pugs, Persian cats) | Breathing restriction, overheating | Avoid peak-heat transfer windows, oversized crate for airflow, airline breed-restriction check |
| Exotic species | Import/export permit complexity, species-specific stress | Destination-country import rules, species-specific carrier, specialist vet sign-off |
Practical steps by category:
- For anxious pets: never sedate without explicit vet approval. Sedatives at altitude can dangerously lower blood pressure and body temperature.
- For brachycephalic breeds: schedule transfers in early morning or evening to avoid heat. Confirm the airline permits the breed on the route before booking anything.
- For exotics: check U.S. Fish and Wildlife Service permit requirements and destination-country rules well in advance. Some species require CITES documentation.
- For elderly animals: a vet clearance within seven days of travel (rather than the standard 10) gives a more accurate fitness assessment.
Where ground-only movement is feasible for shorter distances, it eliminates the altitude and pressurization variables entirely.
How do you handle delays, refusals, and medical emergencies?
Prepare an emergency folder and share it with your driver and any receiving contact before travel day. A folder that exists only in your head helps no one if you’re separated from your pet at the cargo counter.
Emergency contact template (attach to crate and share with driver):
| Contact | Name | Phone | Notes |
|---|---|---|---|
| Home vet | Certificate issuer | ||
| Emergency vet (destination) | Nearest 24-hr clinic | ||
| Airline cargo desk | Flight number | ||
| Transfer driver | Booking reference |
If a handler refuses your animal at check-in:
- Stay calm. Ask the handler to specify the exact reason in writing.
- Verify the paperwork against their stated requirement. Missing a single document is fixable on-site if you have originals in your carry-on.
- Request a supervisor if the refusal seems incorrect.
- Contact your vet immediately. Many can issue corrections or supplemental certificates remotely.
- If travel must be postponed, arrange alternate containment (airport kennel facility or return home) and rebook with the corrected documents.
Medical emergency during transport:
- Direct the driver to the nearest emergency veterinary clinic immediately.
- Call your home vet for phone guidance while en route.
- Keep the pet in the crate unless the vet instructs otherwise. Moving a stressed or injured animal without guidance can worsen the situation.
- Document the incident in writing for the airline and your insurance provider.
How long does preparation take, and what extra fees should you expect?
Most preparation takes 2–6 weeks. The vet certificate window is commonly 10 days for domestic U.S. travel. Crate conditioning requires several weeks to be effective. Starting late compresses every step and increases the chance of a refusal.
Planning timeline:
- 6 weeks out: Research destination requirements, purchase IATA-compliant crate, begin conditioning
- 4 weeks out: Book vet appointment, confirm import/export permits if needed
- 2 weeks out: Confirm crate compliance, finalize document checklist, book premium transfer with pet add-ons
- 10 days out: Obtain health certificate (CVI) from vet
- 1–2 days out: Prepare travel kit, confirm driver details and flight monitoring activation
- Day of: Final feeding record, document pouch attached, driver ETA confirmed
Typical premium transfer extras (confirm final quote with your provider):
| Add-On | Typical Fee Shape | Notes |
|---|---|---|
| Pet-friendly vehicle supplement | Fixed per-trip fee | Climate control, crate securing |
| After-hours pickup | Surcharge on base fare | Confirm threshold hours |
| Terminal access coordination | Included or per-trip fee | Confirm cargo-area authorization |
| Meet-and-greet service | Included or add-on | Confirm terminal and meeting point |
Always ask your provider about refund and cancellation policies for pet transport add-ons specifically. Standard transfer cancellation terms may not cover pet-specific surcharges if a flight is rescheduled.
For stress-free transfer coordination, confirming every add-on in writing at booking prevents billing surprises on travel day.
How does Solidride handle a pet airport transfer from start to finish?
Solidride’s workflow centers on five elements: real-time flight monitoring, pre-authorized terminal access, document verification at pickup, climate-controlled carriage, and a verified handoff to airline cargo or private terminal staff.
Booking-to-handoff workflow:
- At booking: Owner confirms pet species, crate dimensions, flight number, terminal, and required add-ons (meet-and-greet, cargo-area access). Driver receives document checklist.
- 1–3 hours before pickup: Driver runs a pre-transfer check: crate fasteners verified, document pouch confirmed attached, microchip scan validated, pet enters crate voluntarily as a final comfort assessment.
- At pickup: Driver loads crate into the climate-controlled vehicle with the crate secured in a stable position. Climate control is running before the pet enters.
- En route: Flight status monitored in real time. If the flight is delayed, the driver adjusts arrival timing to minimize the pet’s wait in the cargo area.
- At the terminal: Driver accompanies owner to the cargo counter or private terminal handoff point. Document pouch is presented to airline staff. Crate inspection is completed with the driver present.
- Post-transfer: Driver confirms handoff completion to the owner. Any issues noted during transport are documented and shared.
What to confirm in writing at booking:
- Flight monitoring is active and the driver will notify you of status changes
- Driver has pre-authorized access to the cargo or private terminal area
- Vehicle is climate-controlled and crate can be secured during transit
- Emergency response plan is in place (nearest vet, driver protocol)
Solidride’s airport transfer service includes real-time flight monitoring and meet-and-greet as standard features. For pet transfers, pre-authorized terminal access and document-check coordination are confirmed at booking — not improvised on the day.
Note that individual airport rules and airline policies govern final cargo-area access. Ground providers operate within those rules; confirm the specific terminal protocol with your airline when you book the flight.
Key Takeaways
A complete pet airport transfer requires verified documents, a conditioned IATA-compliant crate, and a premium driver who monitors your flight and coordinates the terminal handoff before you leave home.
| Point | Details |
|---|---|
| Vet certificate timing | Obtain the health certificate within 10 days of departure for domestic U.S. travel; book the vet visit 4–6 weeks out. |
| Crate compliance | Use a metal-bolted, ventilated, leak-proof crate with “LIVE ANIMAL” labels and a document pouch attached to the exterior. |
| Conditioning timeline | Start crate acclimation 4–6 weeks before travel; pair it with meals and short car rides for best results. |
| Emergency folder | Prepare a contact sheet with owner, vet, airline cargo desk, and driver details; share it with your driver before travel day. |
| Solidride booking | Confirm flight monitoring, meet-and-greet, terminal access, and pet surcharge details in writing when booking with Solidride. |
Why premium transfers actually change the outcome for your pet
The conventional advice on flying with pets focuses almost entirely on paperwork and crate specs. Both matter. But the part that determines how your animal actually experiences the day is what happens between your front door and the cargo counter — and that’s where most owners have the least control.
A driver who monitors your flight and adjusts arrival timing keeps your pet out of a loud, temperature-variable cargo holding area for an extra 45 minutes. That’s not a luxury detail. For a brachycephalic dog or an anxious cat, 45 minutes in a noisy cargo zone versus a quiet, climate-controlled vehicle is a meaningful welfare difference.
The other thing people underestimate: a driver with pre-authorized terminal access can accompany you to the cargo counter. That means one fewer handoff, one fewer unfamiliar person handling the crate, and a faster document check because the driver already knows what’s in the pouch. Proactive coordination — flight monitoring and driver-terminal authorization — reduces hold times and exposure to stressful airport environments in ways that no amount of crate conditioning can fully compensate for.
Book the return trip with the same provider. Consistency in the vehicle, the driver, and the handoff protocol matters more on the return leg, when your pet is already tired.
Traveling to or from Estonia with a pet? Solidride has you covered
Solidride offers pet-friendly premium transfers in Estonia with real-time flight monitoring, personalized meet-and-greet, climate-controlled Mercedes-Benz vehicles, and document-handling coordination built into every booking. You’re not arranging a standard taxi and hoping the driver knows what to do with a kennel. You’re booking a service where the driver runs a pre-transfer crate check, monitors your flight, and accompanies you to the terminal handoff point.

What to confirm when you book: terminal access authorization, crate securing in the vehicle, pet surcharge disclosure, and the emergency response protocol. Solidride’s team handles the coordination; you handle the documents and the crate prep. To get started, book your transfer or review the full premium transfer checklist to confirm every add-on before travel day.
Add a comment